Displaying Check Register ( Use t-code - FCHN)

Step 1) Give Paying company code
Execute

Step 2) Double click check to display check information
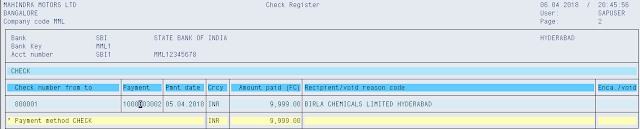
Here we see check details

Step 1) Give Paying company code
Execute
Step 2) Double click check to display check information

Here we see check details