Define Dunning Areas

Define Dunning Areas

Path: SPRO - Financial Accounting - Accounts Receivable and Accounts Payable - Business Transactions - Dunning - Basic Settings for Dunning - Define Dunning Areas (Transaction code is OB61)


In the menu path select


Step 1) Select New Entries button


Step 2) Give Company code and Text
Leave Area blank


Step 3) Select the save buttonwe receive a message below


Press enter to save in your request we get a message below


Dunning in SAP

Dunning
When goods or services are sold to the customers, payment is expected to be received. From this moment, incoming payments are monitored to make sure customer debts are paid on time. When there is delay in payment company needs to remind outstanding liabilities of the customers.
Dunning enables generation of letter to the all the A/R outstanding invoices. If customer does not make the payment as per terms of payment system will issue dunning letters. For sending the letter we can collect dunning charges from the customer. Charges are shown in the letter.
Example:
Maximum dun levels - 9 levels
We are using - 4 levels
Dunning frequency - 10 days
Grace period - 3 days
Payment terms - Payable immediately (0001)
Sales on 16.11.2018

1st Letter 2nd Letter 3rd Letter 4th Letter
20.11.2018 30.11.2018 10.12.2018 20.12.2018

Configuration Settings

1) Define Dunning Areas

2) Define Dunning Procedure

3) Assign Dunning Procedure in Customer Master

End User Area

1) Sales Invoice Posting

2) Dunning Run 

Dunning Run In SAP

Dunning Run

Path: Accounting - Financial Accounting - Accounts Receivable - Periodic Processing - Dunning (Transaction code is F150)


Step 1) Populate the fields: Run On and Identification
Select the Parameter tab


Step 2) Populate the fields: Dunning date, Documents posted up to and Company Code
Select Customer from the drop down menu


Select the save buttonwe receive message below


Step 3) Select the back arrow
Select Schedule button
Give Output device
Press Continue


Step 4) Select Start Immediately check box
Select the Schedule button


Keep pressing enter until status changes to Dun selection is completed


Step 5) Select Dunning printout button
Give Output device
Press Continue


Select print button in the pop up window
Keep pressing enter until status changes to Dun printout is completed


Step 6) Select Dunning history button
Give Company code
Execute


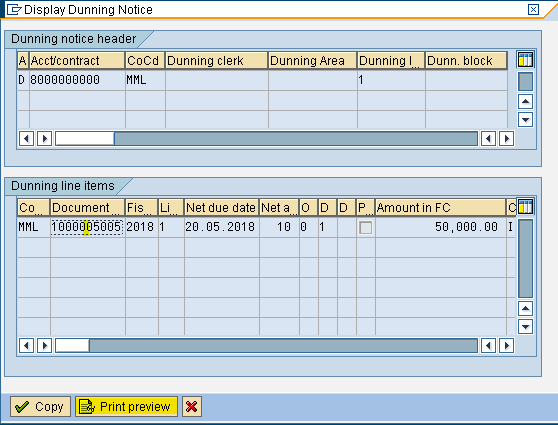
Step 7) Place the cursor on 50000/-
Select Display dunning notice button


Keep the cursor on document number
Select Print preview button


Give Output device
Press Continue


Letter is Generated


Sales Invoice Posting

Sales Invoice Posting

Path: Accounting - Financial Accounting - Accounts Receivable - Document Entry - Invoice - General (Transaction code is F-22)


Step 1) Populate the following fields: Document Date, Type, Company Code, Posting Date, Period, Currency and Posting key.
Select the Customer Account from the drop down button and press enter


Step 2) Populate the following fields: Amount, Business Area, Text, Posting key and Account in the next screen and press enter


Step 3) Populate the following fields: Amount, Business Area and Text in the next screen


Step 4) From the menu select document and press simulate to view the document details


Step 5) Select the save buttonwe get a message below


Assign the Dunning Procedure in the Customer Master

Assign the Dunning Procedure in the Customer Master

Path: Accounting - Financial Accounting - Accounts Receivable - Master Records - Maintain Centrally - Change (Transaction code is XD02)


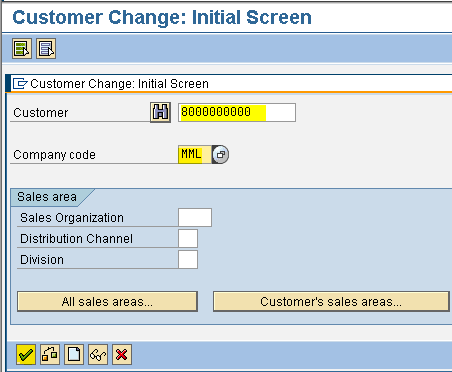
Step 1) Give Customer account number and Company code
Press enter


Step 2) Select Company Code Data button in the next screen


Step 3) Select the Correspondence tab
Select the Dunning Procedure defined previously from the drop down menu


Step 4) Select the save buttonwe receive a message below

Define Dunning Procedures

Define Dunning Procedures

Path:
SPRO - Financial Accounting - Accounts Receivable and Accounts Payable - Business Transactions - Dunning - Basic Settings for Dunning - Define Dunning Areas (Transaction code is FBMP)


In the menu path select


Step 1) Select New Procedure button in the next screen
Populate the fields: Dunning procedure, Name, Dunning intervals in days, No.of dunning levels and Line item grace periods
Select Interest indicator for the drop down menu
Select Standard Transaction Dunning check box
Select Dunning Texts Button


Ignore the warning message
Press enter


Step 2) Give company code and select customer radio button
Press enter

Step 3) Select new company code buttonin the next screen
Give the Company code 
Enter


For the Company code MML select Separate notice per dunning level check box


Select the back arrow twice
Select yes button for the message to save data


Press enter to save in your request

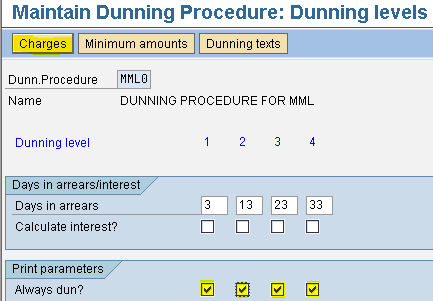
Step 4) Select Dunning levels button
Select Always dun check box for all four levels
Select charges button


Give the currency INR
Press enter


Step 5) Give the Dunning levels and Dunning charges
Select Dunning texts button


Give company code and select customer radio button
Press enter


Step 6) Give Dun level and Form name
Select the charges button


Give currency INR
Press enter

Select the back arrow

Press save button
Ignore the warning message press enter


Press enter to save in your request
We receive a message below