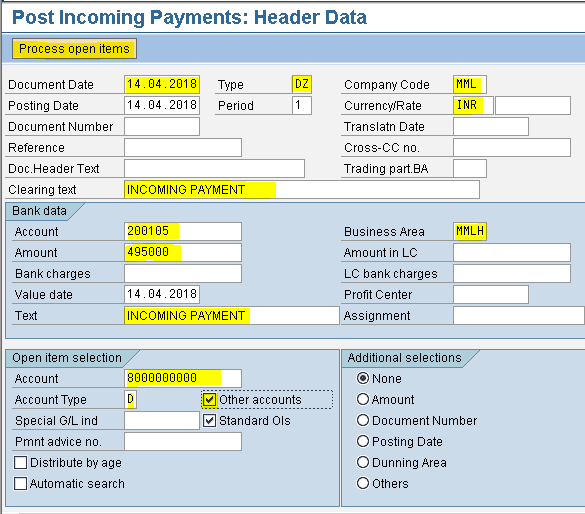
Assign Number Ranges to Customer Account Groups
Path: SPRO - Select SAP Reference IMG - Financial Accounting - Accounts Receivable and Accounts Payable- Customer Accounts - Master Data - Preparation for Creating Customer Master Data -Assign Number Ranges to Customer Account Groups (Transaction code is OBAS)


Select the menu path

Step 1) Select position button

Step 2) Give account group and press enter

Step 3) Select the Number range defined previously from the drop down menu for account groups

Step 4) Select save button we get message below

Path: SPRO - Select SAP Reference IMG - Financial Accounting - Accounts Receivable and Accounts Payable- Customer Accounts - Master Data - Preparation for Creating Customer Master Data -Assign Number Ranges to Customer Account Groups (Transaction code is OBAS)
Step 1) Select position button
Step 2) Give account group and press enter
Step 3) Select the Number range defined previously from the drop down menu for account groups
Step 4) Select save button
we get message below